-
Inverse Kinematics
After you have set bones in the object.
Object Mode > Add > Armature-
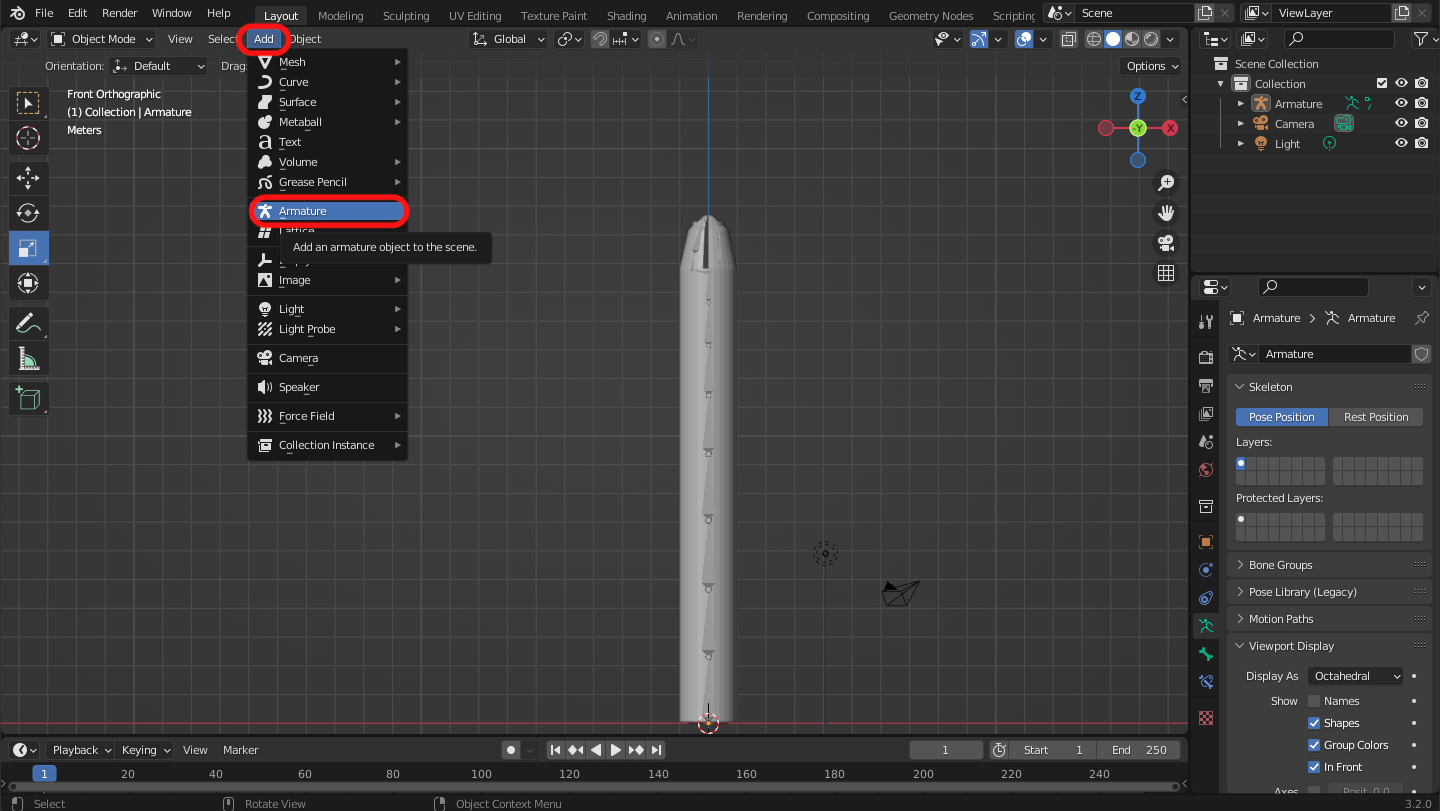
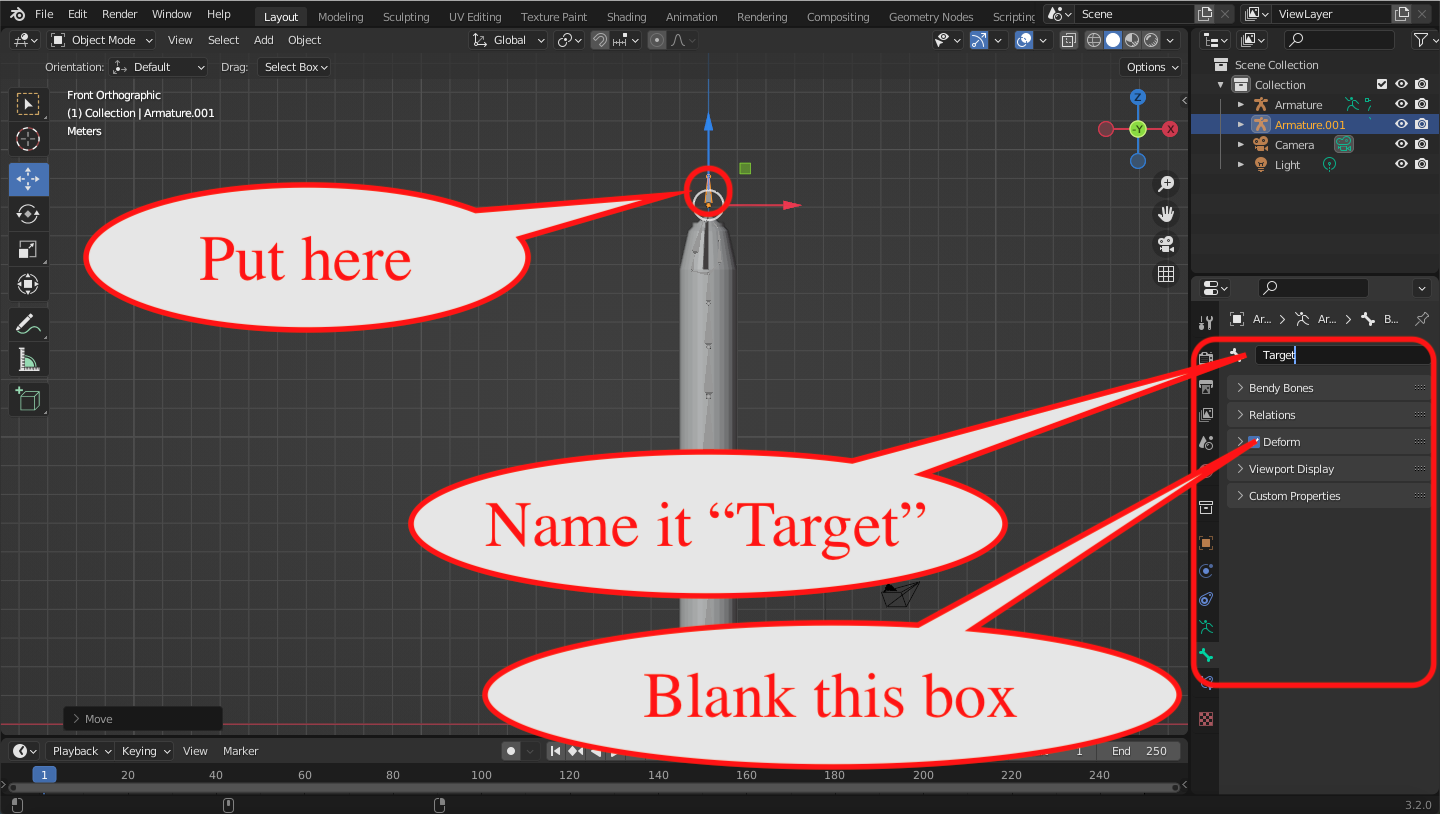
Set it around the top of the object. > Name it "Target" > Blank the "Deform Check Box"
-
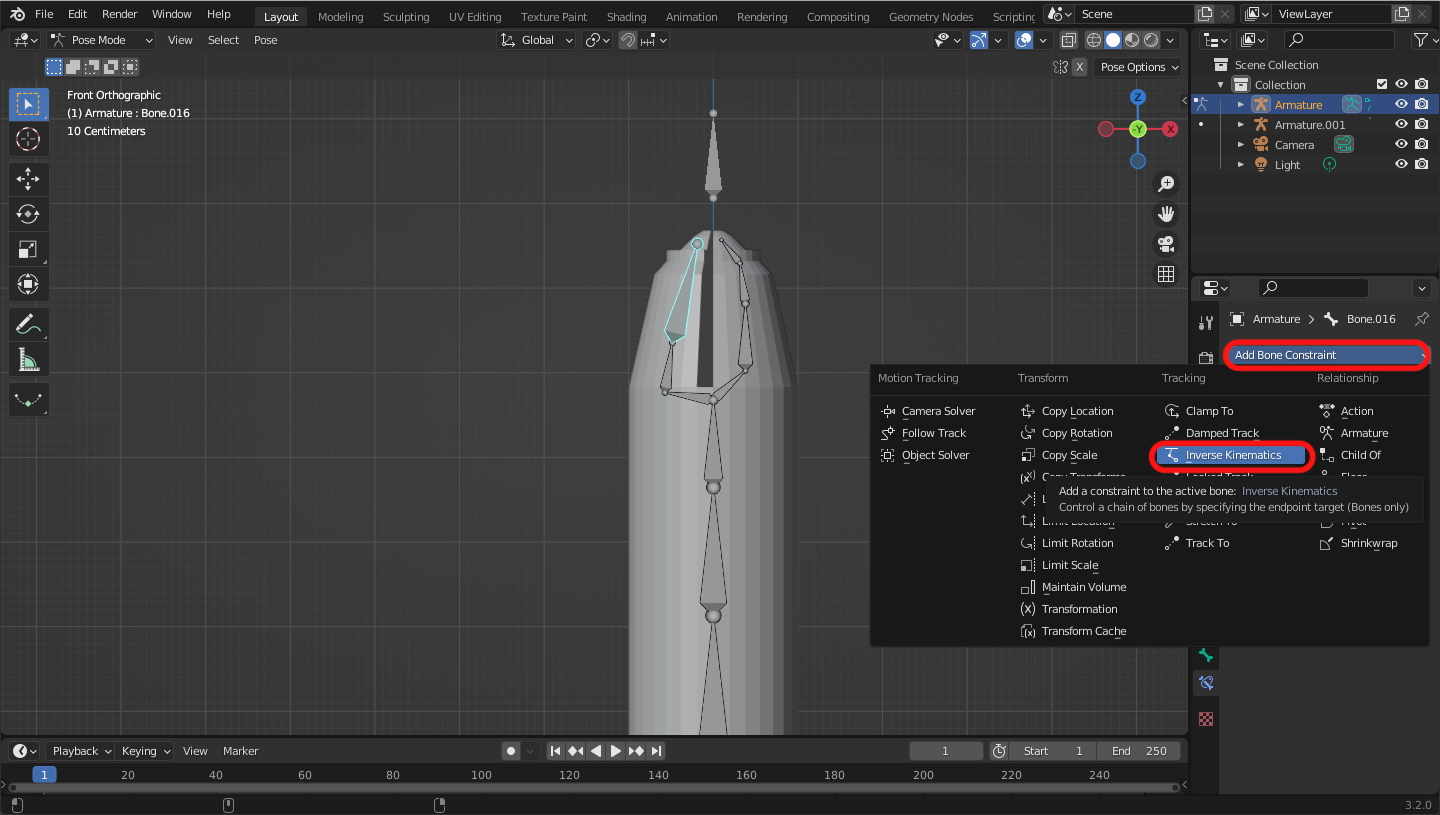
Select the top bone of the object.
-
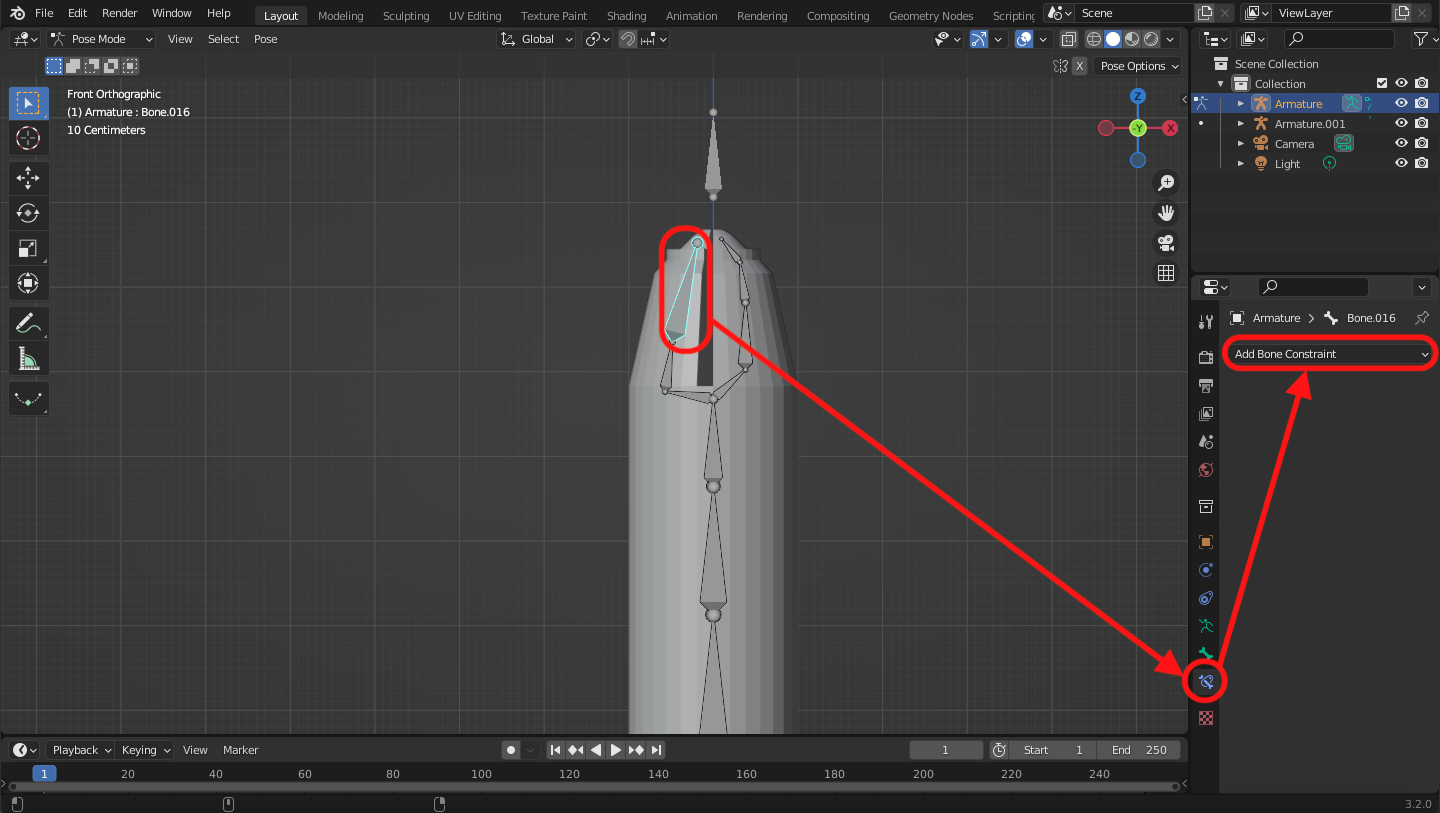
Add Bone Constraint > Inverse Kinematics
-
Target "Armature" > Bone "Target"
-
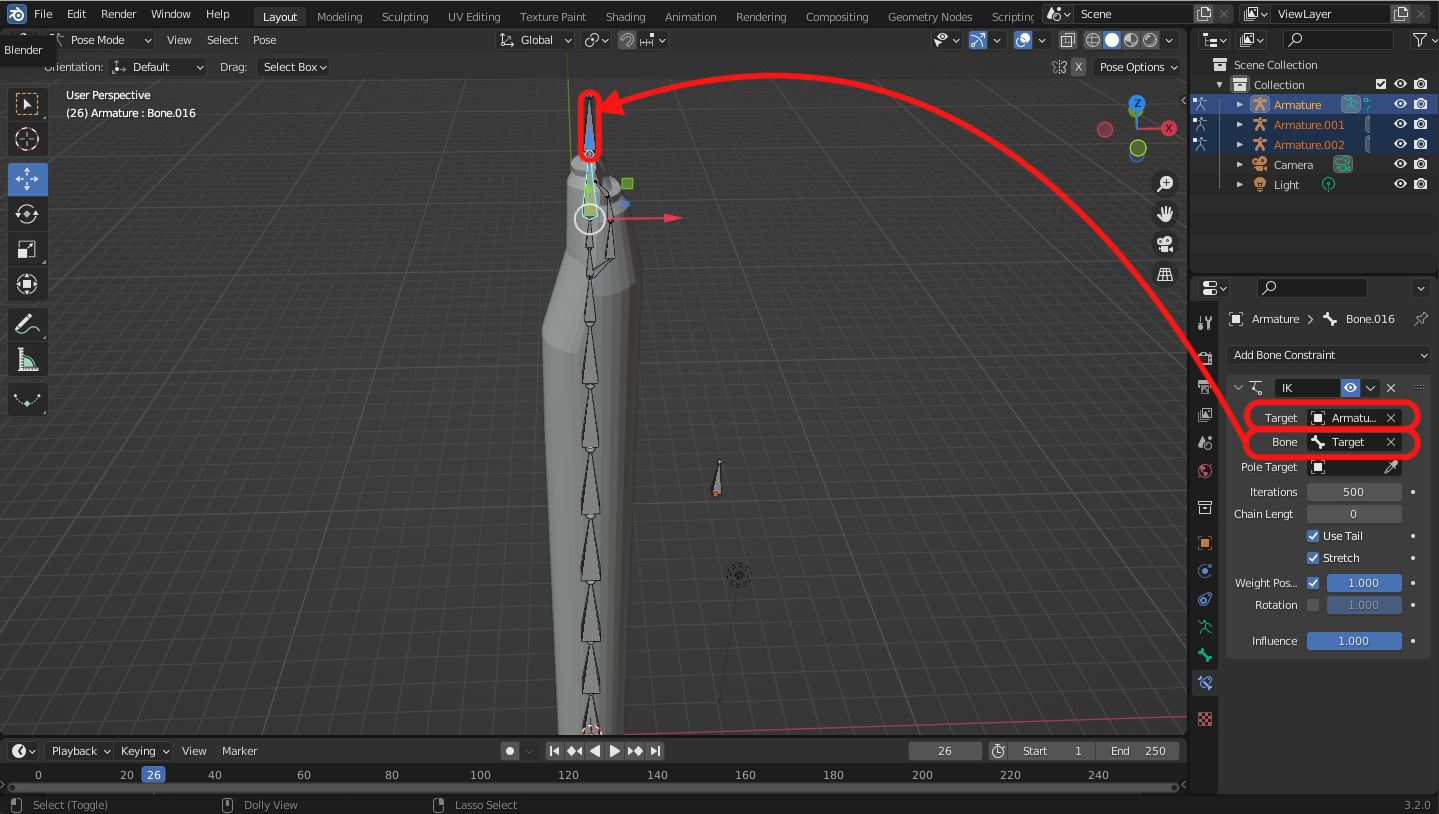
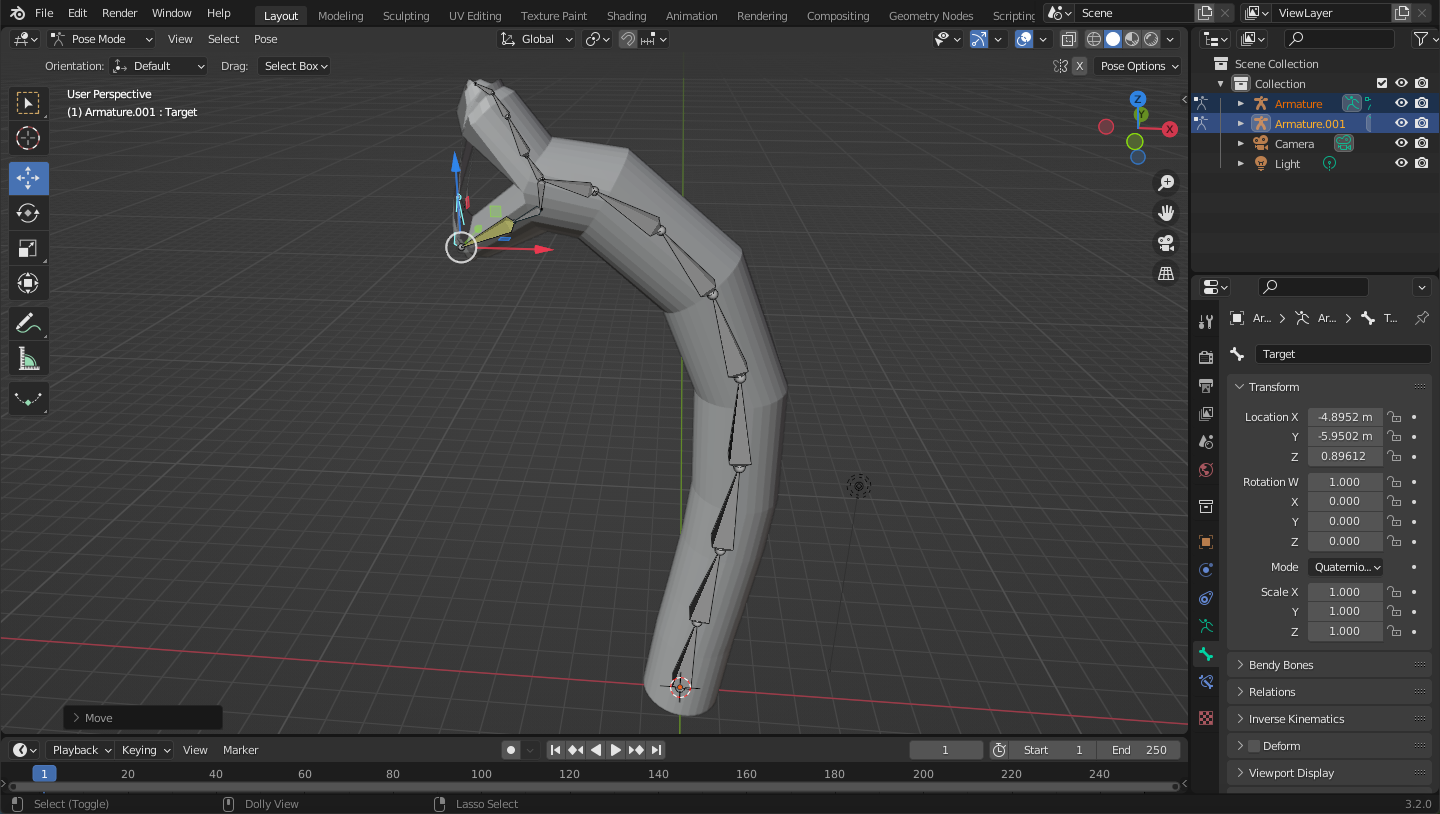
Now, all parts of the object follows the Target bone.
-
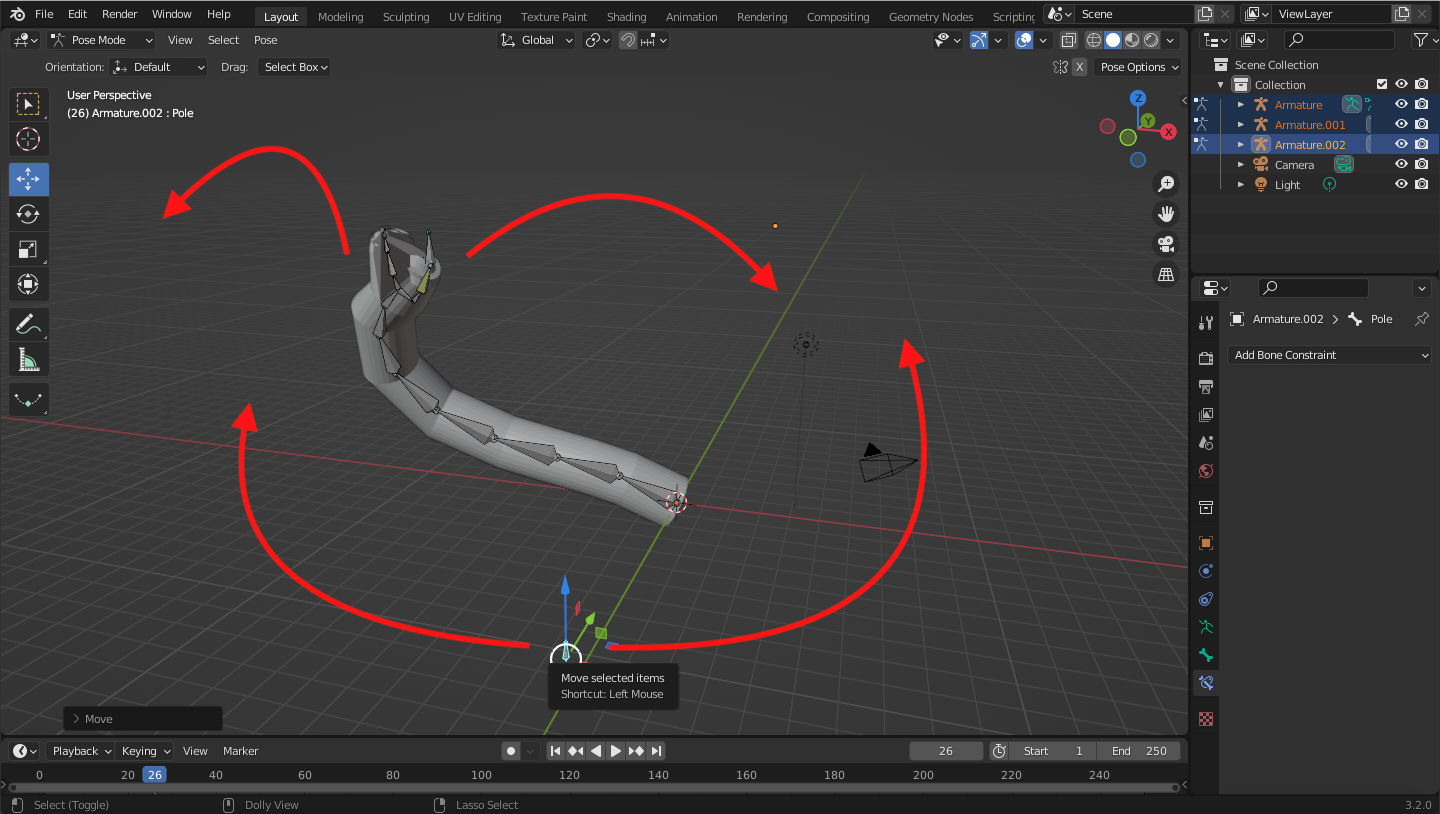
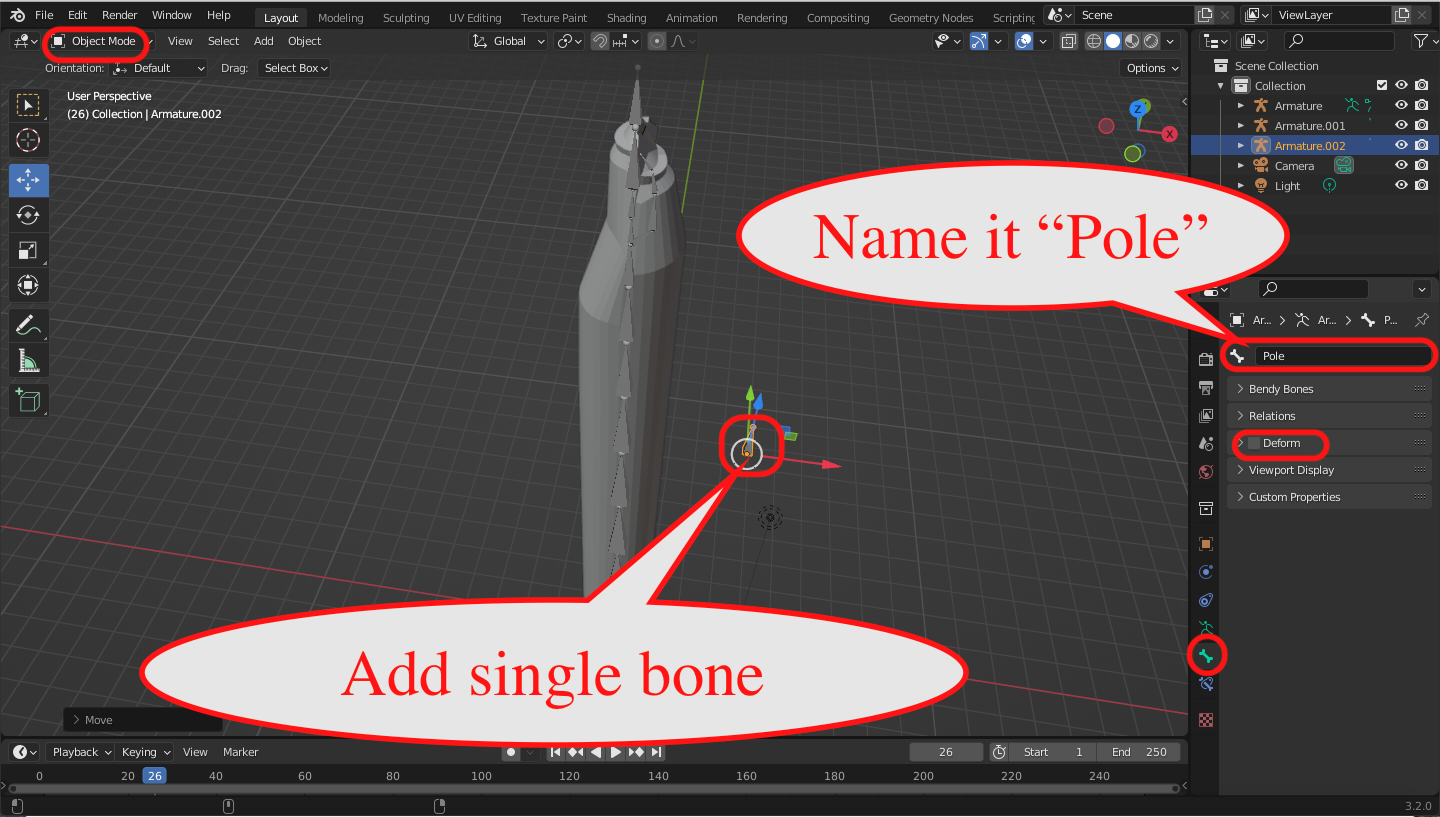
For moving in all directions, you have to set the POLE.
Add single bone > Name it "Pole" > Blank the "Deform check box"-
Select the top bone of the object. > Pole Target "Armature" > Bone "Pole"
-
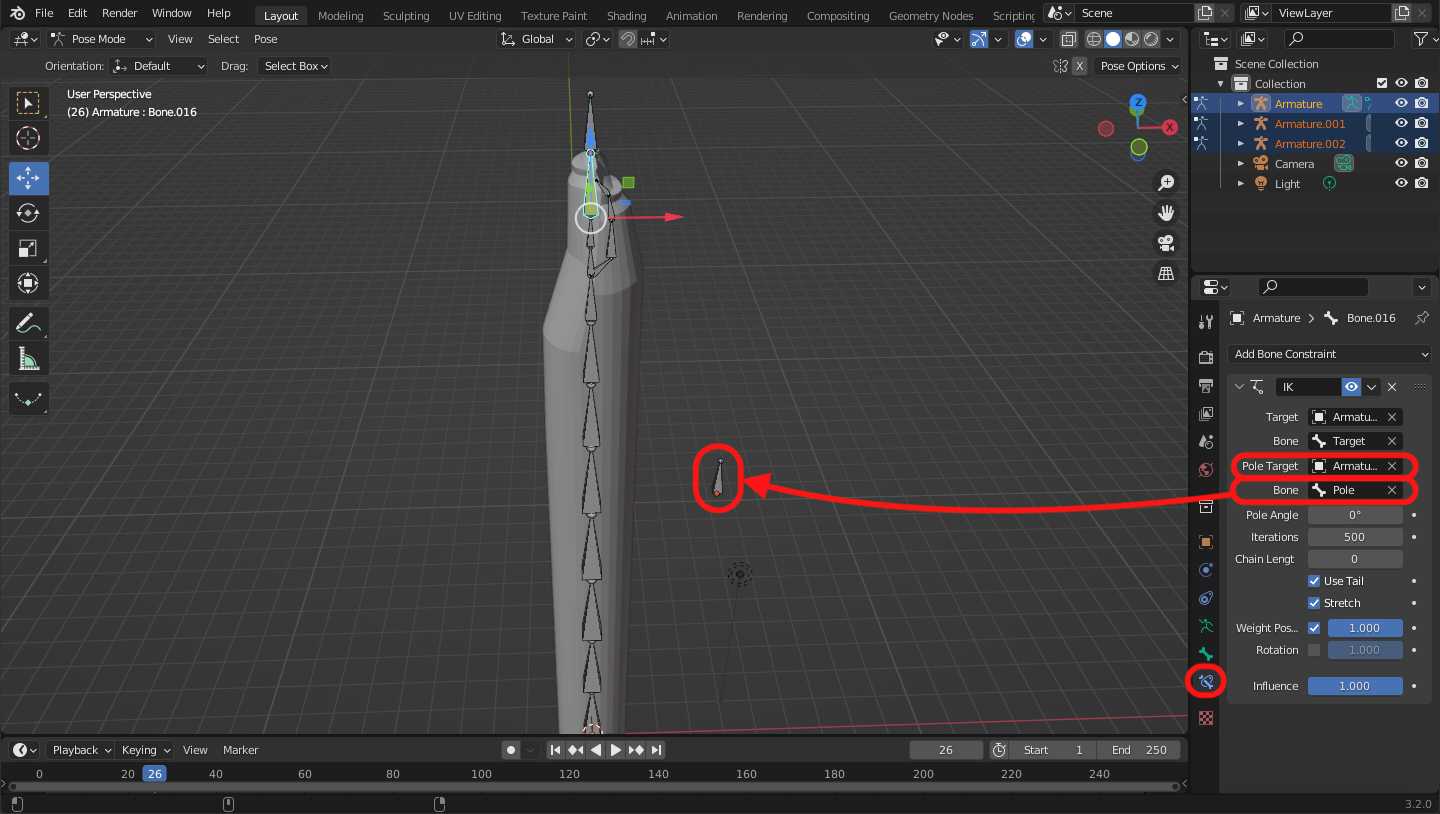
Then, you can move the object in any direction with all bones of the object
-